
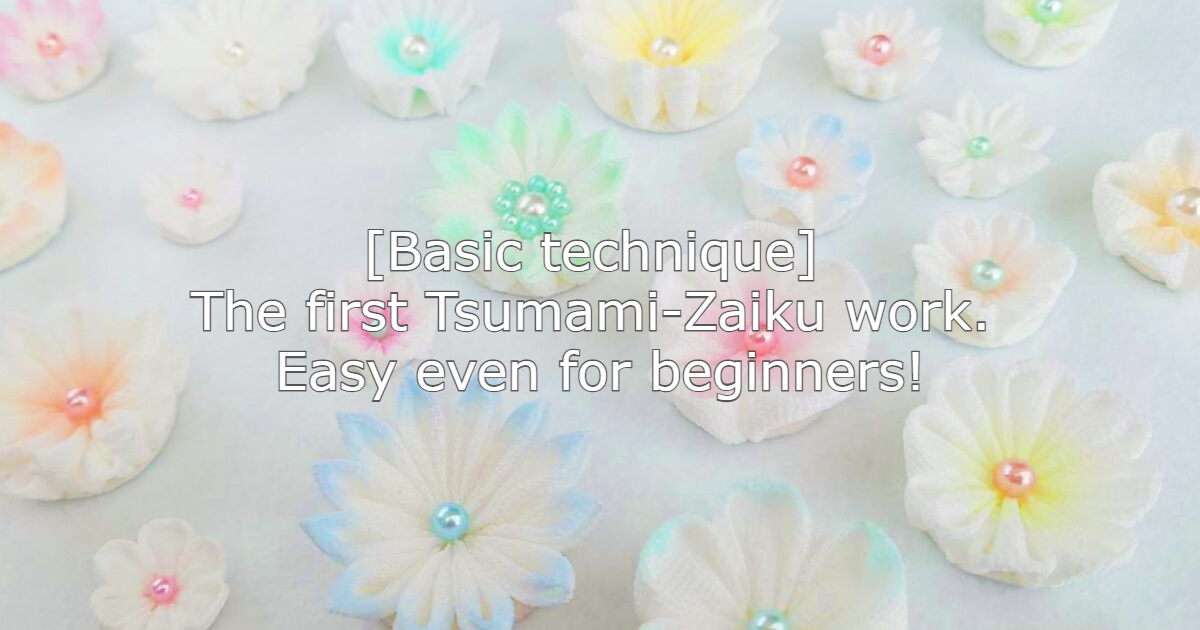
A delicate and secret piece of cloth art “Tsumami-Zaiku”
*[Tsumami-Zaiku] means knob handiwork.
At first glance, you may think that the gorgeous and beautiful nibbles in traditional Japanese crafts are “It seems difficult …”
However, it is surprisingly simple.
If you can learn the basic skills, you can make pretty and gorgeous flowers.
This time, I will introduce you to two basic techniques [Maru-Tsumami] and [Ken-Tsumami].
*[Maru-Tsumami] means round knob.
*[Ken-Tsumami] means sword knob.
Then let’s make up Tsumami-Zaiku work ~ ^ ^!
some tool that is necessary for making something that can be Tsumami-Zaiku
Tsumami-Zaiku’s tools are 👇 here 👇.
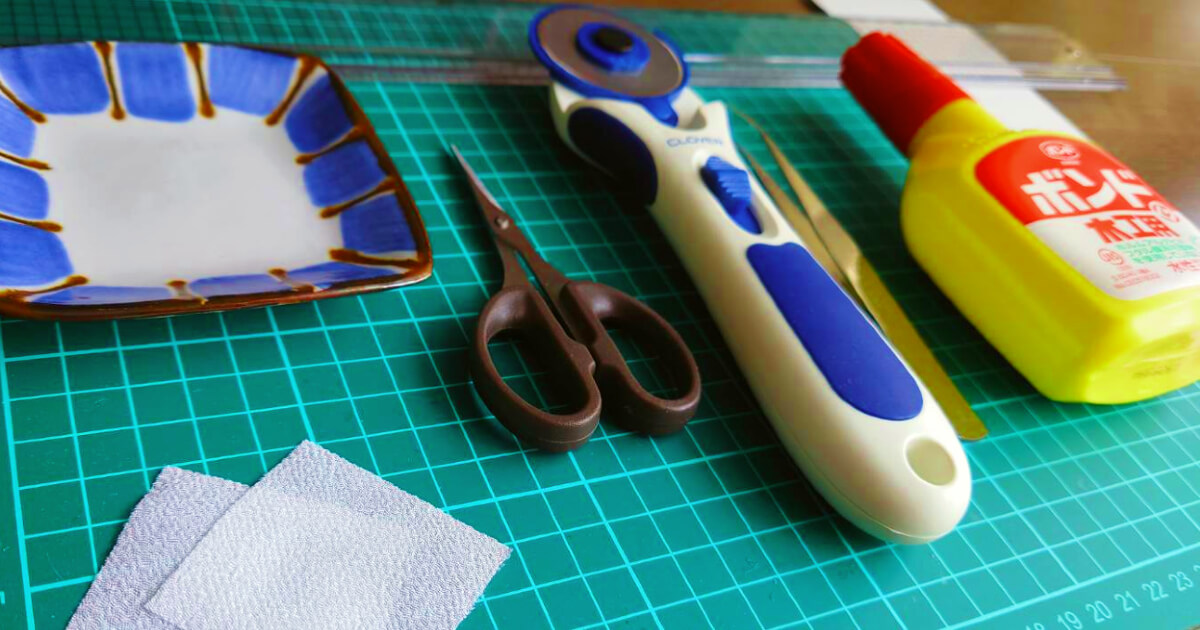 Actually, you can make it even if you don’t have a special tool for making Tsumami-Zaiku.
All the tools can be bought at the stationery shop.
🌸 Cutter Knife/Rotary Cutter
🌸Cutter Mat
🌸 Rulers
🌸 Scissors
🌸 Tweezers
🌸 Bond for Machining
🌸 Plates, sheets, etc for taking out the bond
🌸 Cloth/crepe, feather or cotton etc.
Incidentally, …
The glue mentioned in 👆 above is for ordinary handicraft, but there is also glue for Tsumami-Zaiku.
Traditional [starch glue / Denpun-Nori] 👇
この投稿をInstagramで見る
“I want to make it with starch glue!” If you think that, it’s different from the recipe I’m going to show you, so I’ll show you again if I have a chance.
And …
There is also a glue called “Hime-Nori” ^ ^
👇 Hime-Nori (Seaweed made by boiling rice softly)👇
この投稿をInstagramで見る
There are various kinds of glue, and there are merits and demerits!
I will introduce this if I have the chance.
Basic Technique of Maru-Tsumami
*[Maru-Tsumami] means round knob.
I will explain how to make a Maru-Tsumami.
① First, cut the cloth into a square
 The size depends on the size of the flower you want to make, but I cut the cloth into a 2 x 2 cm square for practice.
*You can use any square size you like.

② Attach the glue to the three corners of the square cloth and fold it in half
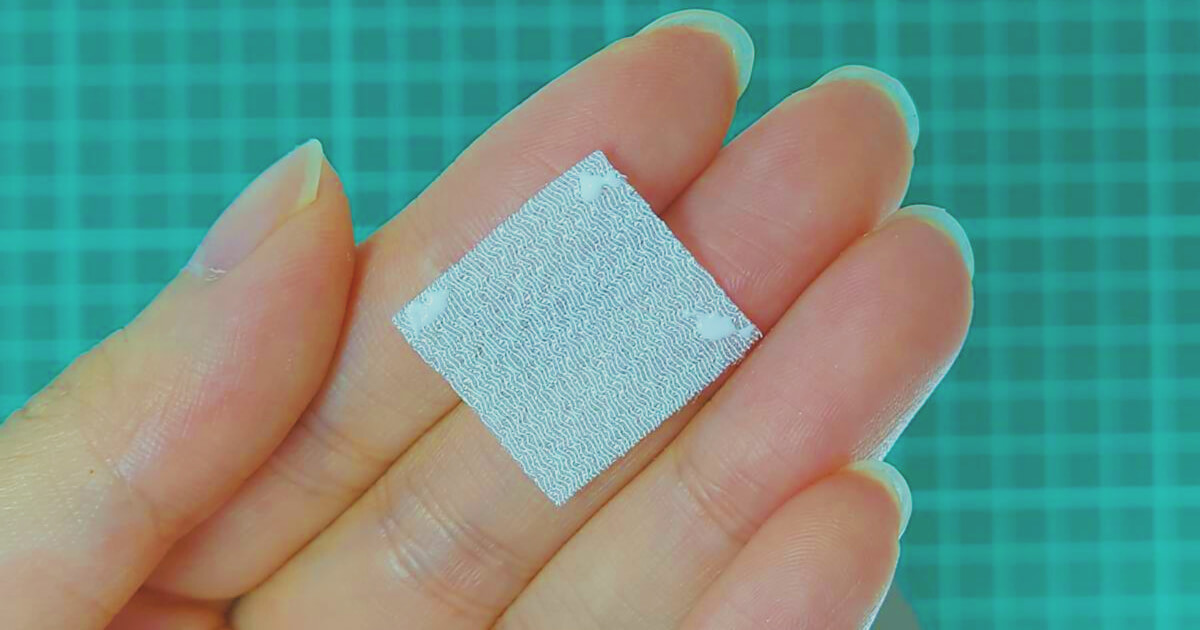 Fold a square piece of cloth into a triangle. At that time, fix 3 corners with bond so that the shape doesn’t collapse.
*You don’t have to fix it! It is not necessary for those who say that ^ ^
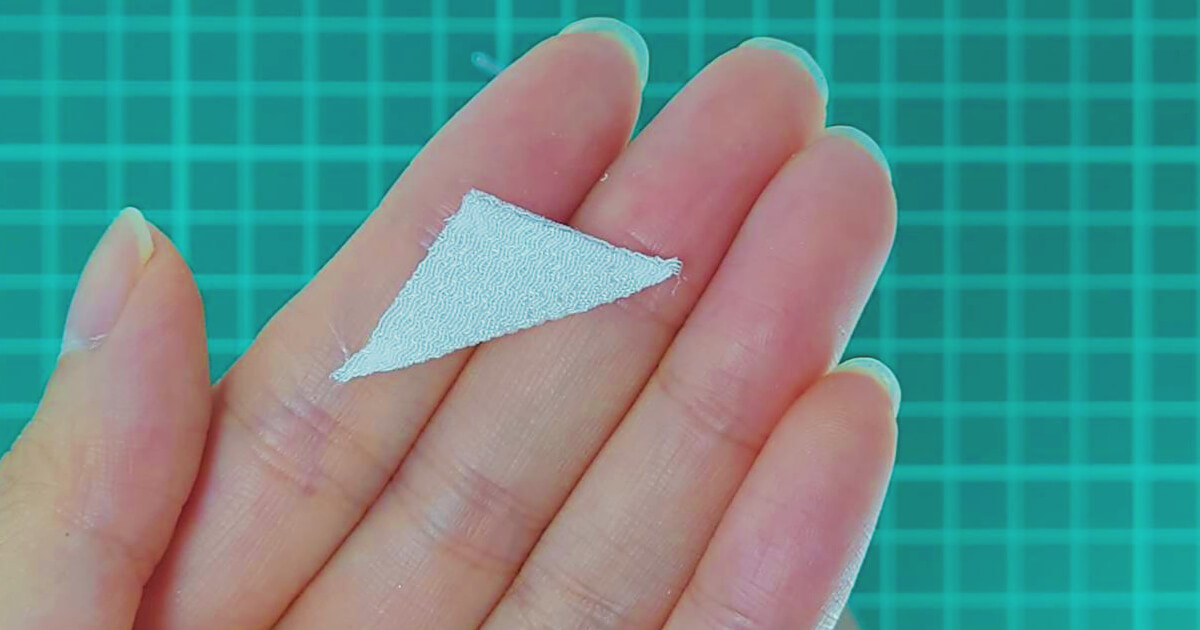
③ Fold it in two again
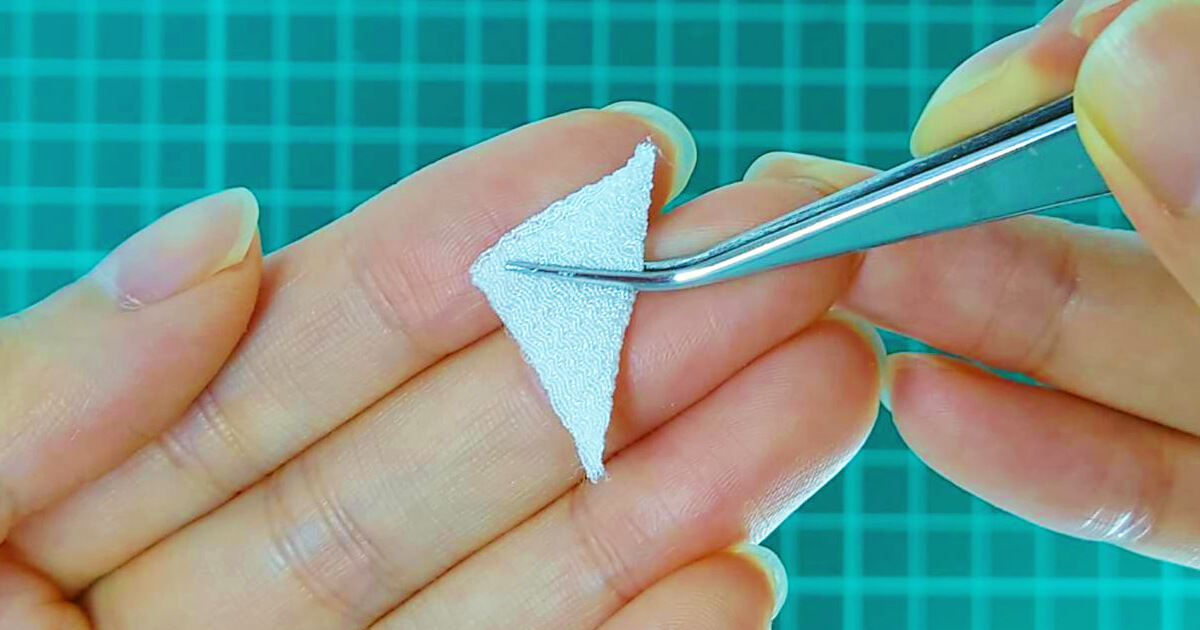
 Make smaller triangles. (Fold it in half.)
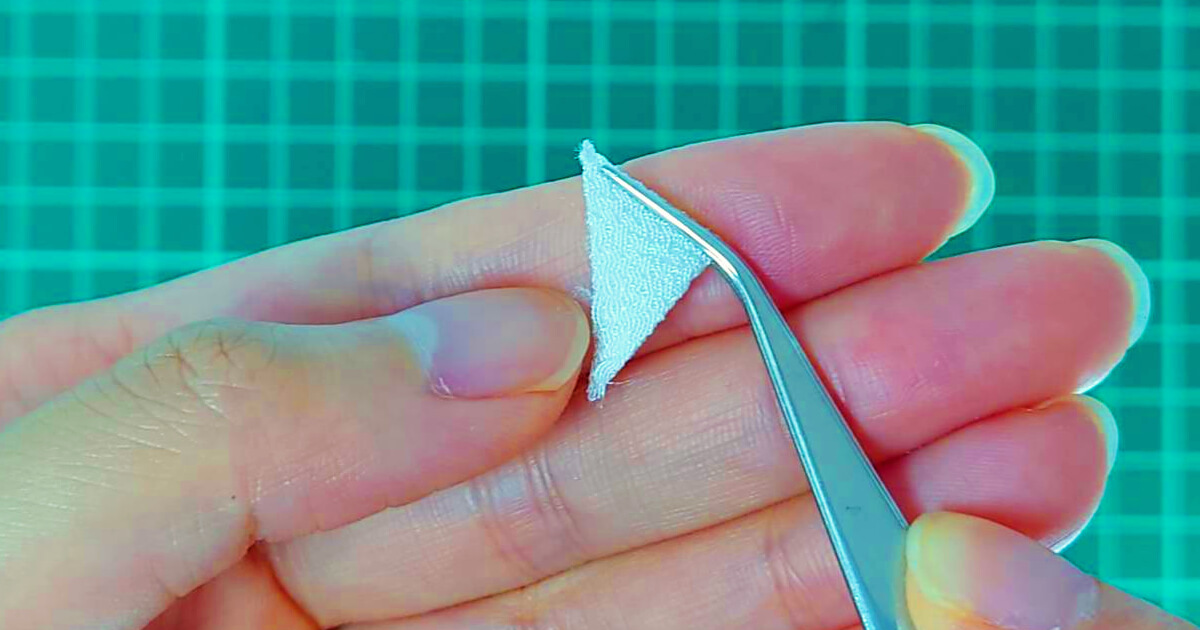
④ Fold Both Ends
 Use tweezers to pinch the center of the triangle (as shown in the photo), then lift the lower flicker corner and fold it back.
*Please refer to the photo if it is difficult to tell.
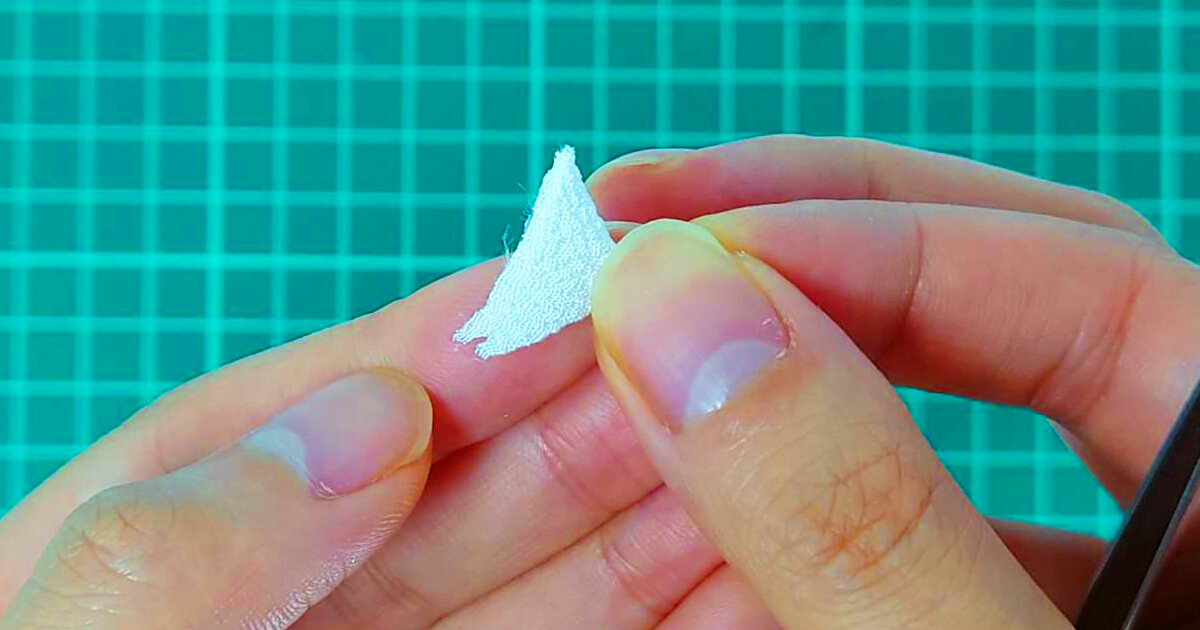
⑤ Fix by attaching a bond to the three corners
 Fix it by attaching glue to the place where 3 corners are gathered.
In that case, don’t put too much glue on it. It is a tip to make a round knob beautifully.

Like that👆
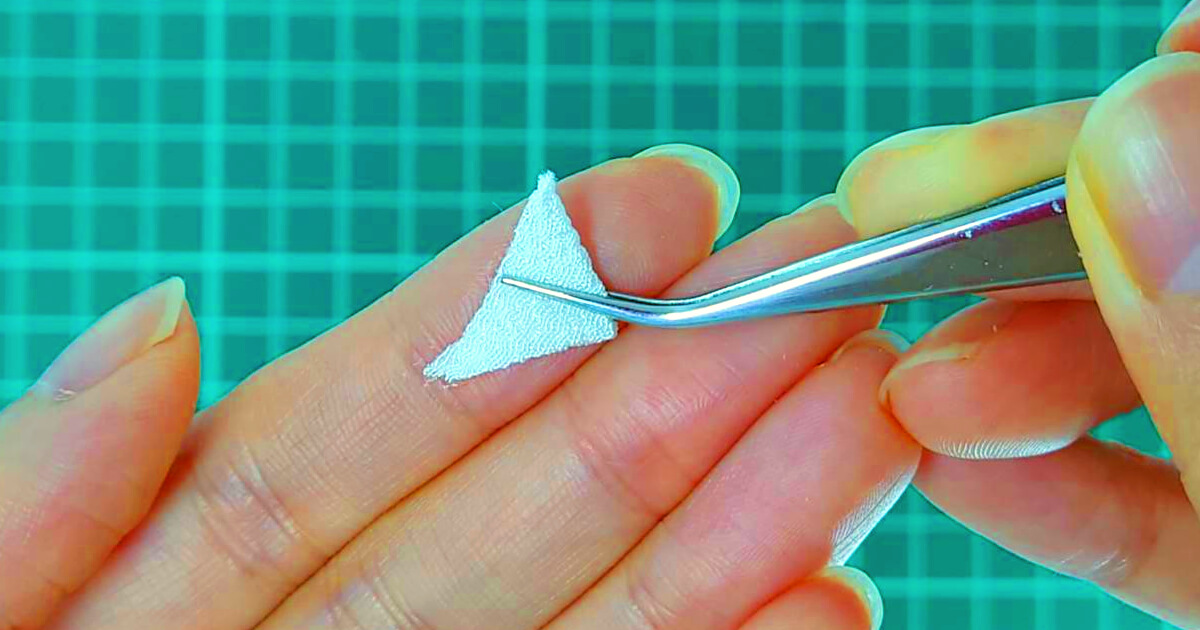
⑥ Finally, adjust the shape
 Shape the flower petals so that they are rounded by pushing them out from the back so that the center of Maru-Tsumami folds back.
Also, if the edges are dirty or not aligned, cut them to trim them.
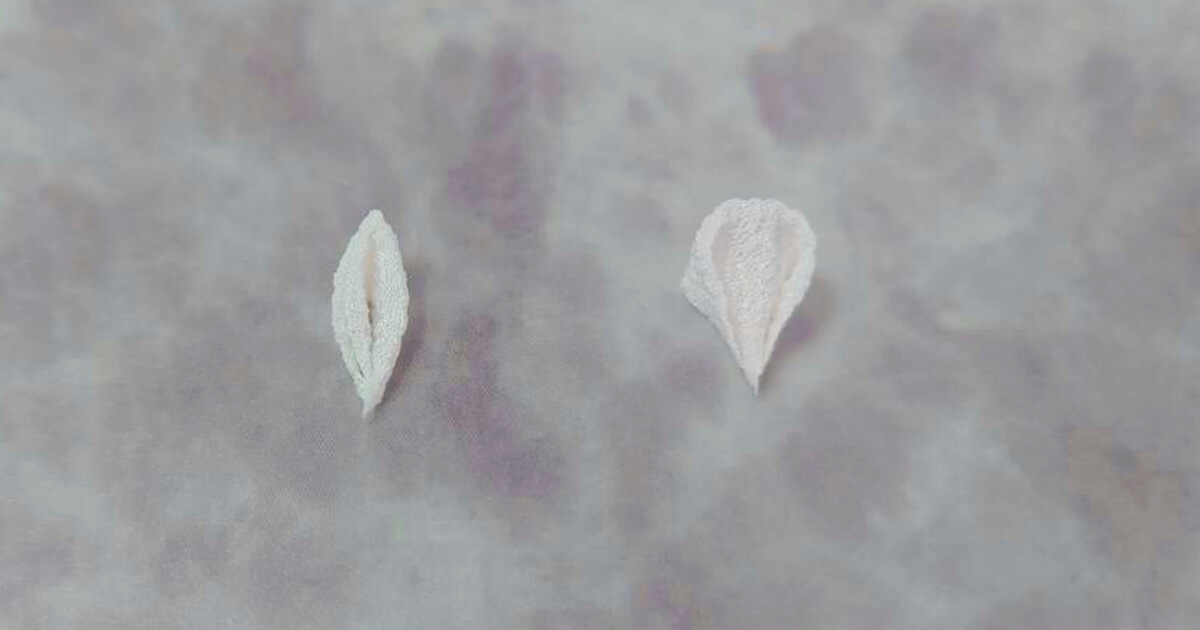
⑦ Done!
 This is the complete Maru-Tsumami.
Thank you for your hard work!
It’s easy, isn’t it?
Make several round pinches to make flower petals, and attach them to the base to complete the Tsumami-Zaiku.
*I will explain the foundation next time!
Basic technique of Ken-Tsumami
Next, I will explain how to make Ken-Tsumami.
① First, cut the cloth into a square
The size depends on the size of the flower you want to make, but I cut the cloth into a 2 x 2 cm square for practice.
*You can use any square size you like.
② Attach the glue to the three corners of the square cloth and fold it in half
Fold a square piece of cloth into a triangle. At that time, fix 3 corners with bond so that the shape doesn’t collapse.
*You don’t have to fix it! It is not necessary for those who say that ^ ^
③ Fold it again
Make smaller triangles. (Fold it in half.)
④ Fold it in half again
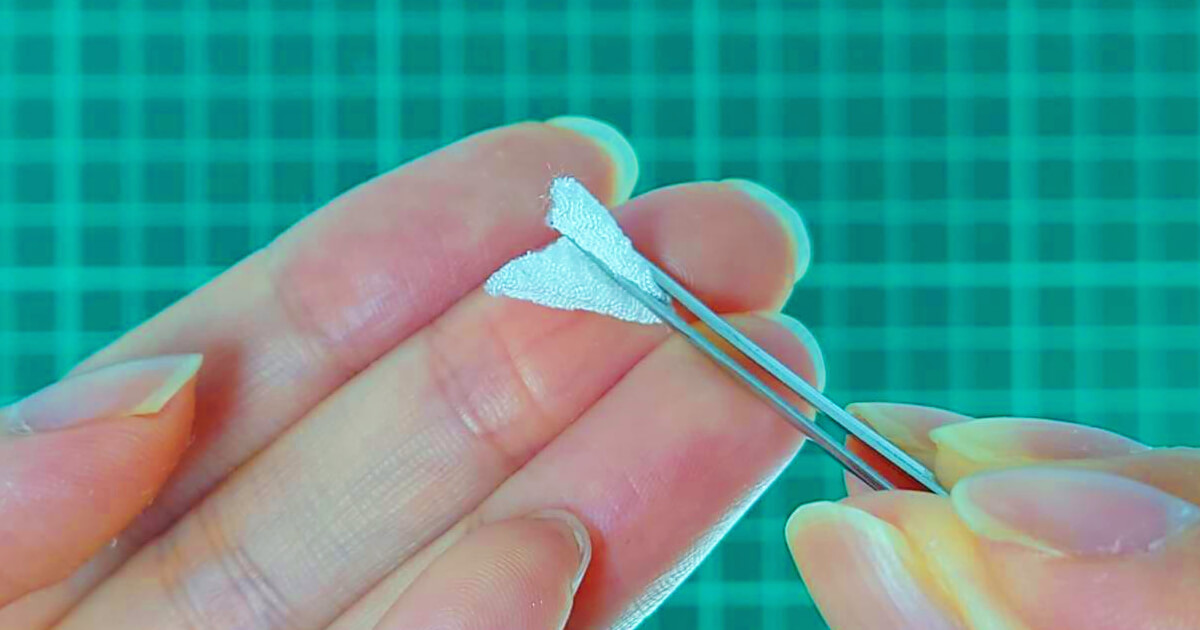
Use tweezers to pinch the center of the triangle (as shown in the photo) and fold back both sides in the same direction.
*Please refer to the photo if it is difficult to tell.
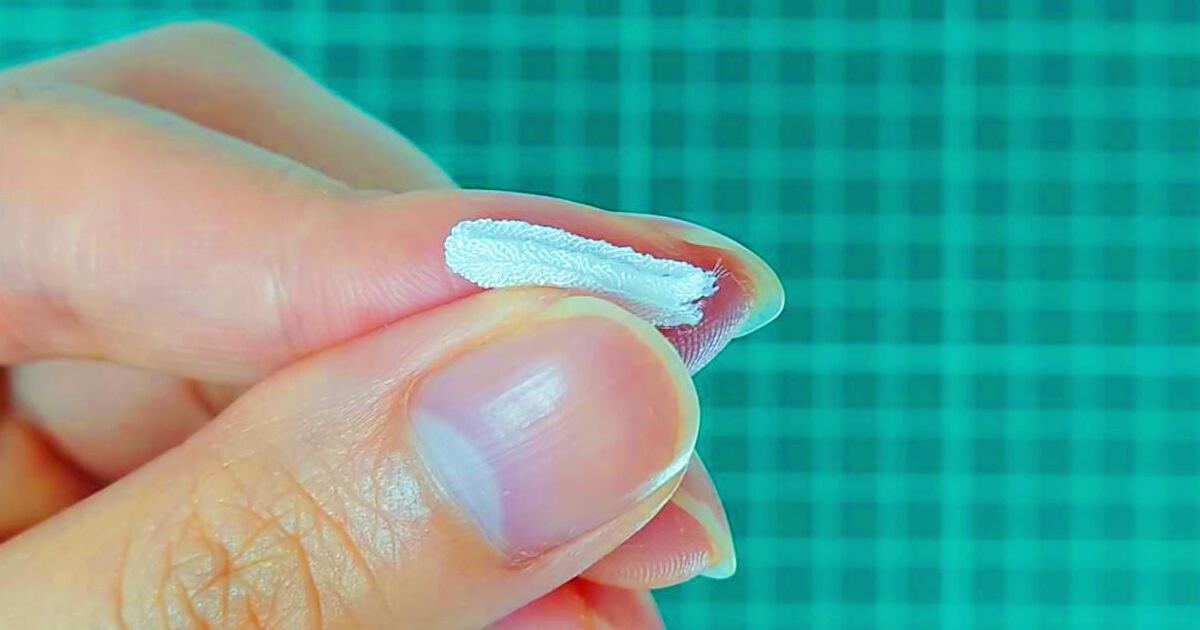
⑤ Fix by attaching glue to the 3 corners
 The bond is turned on where the three corners are gathered and fixed.
In that case, don’t put too much glue on it. It is a tip to make Ken-Tsumami beautifully.
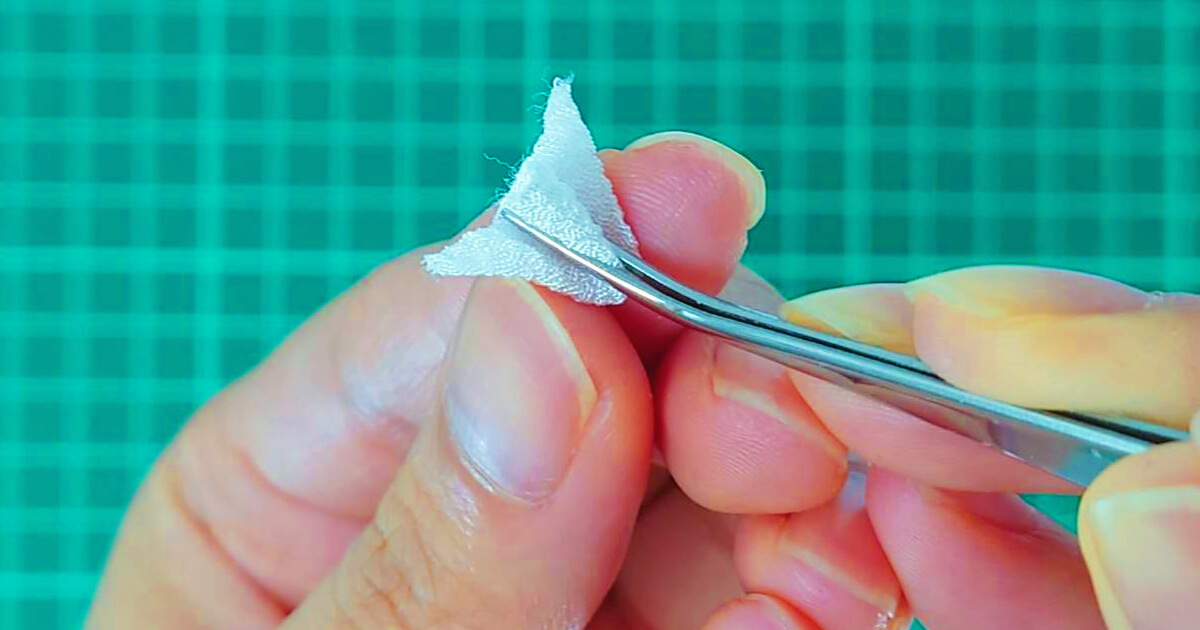
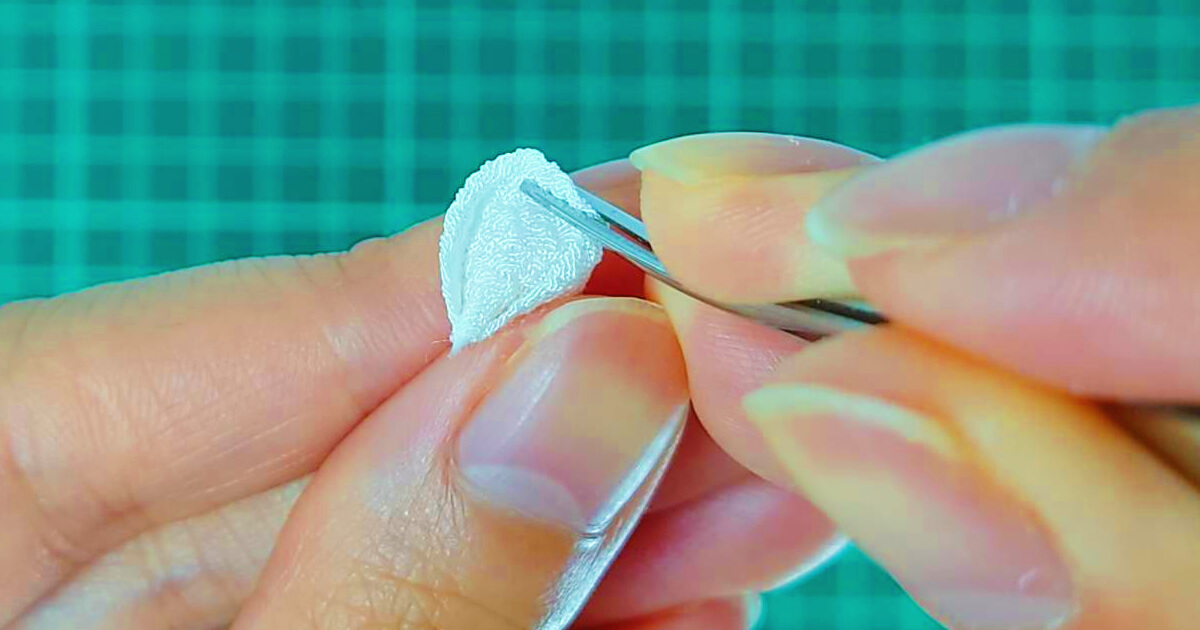
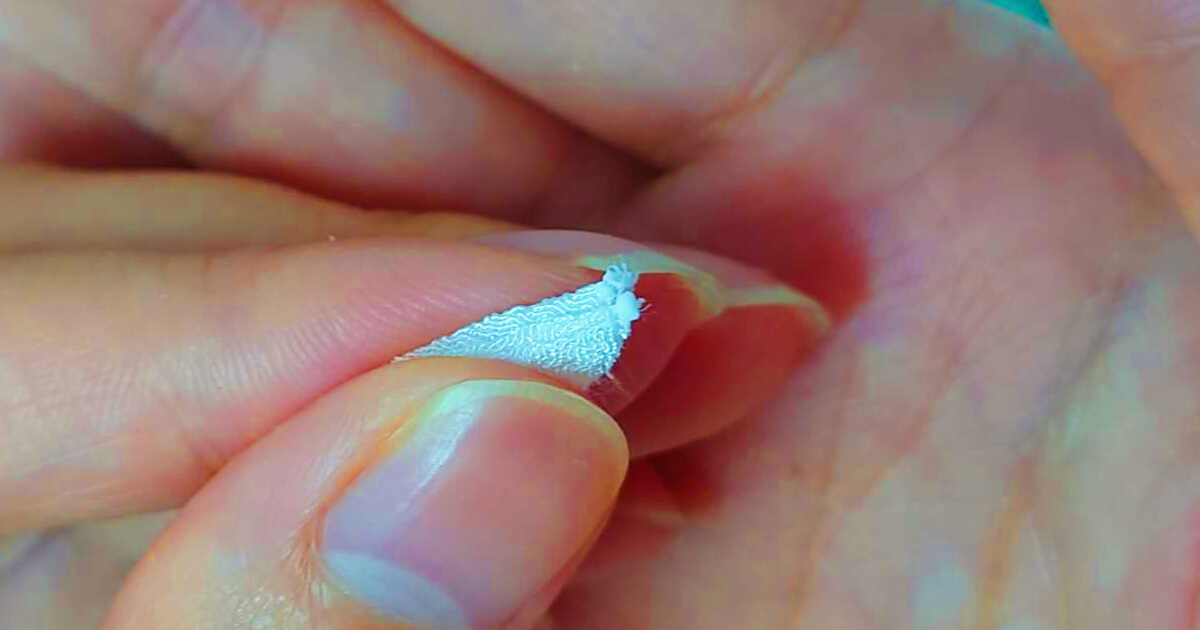
⑥ Cut the unnecessary part
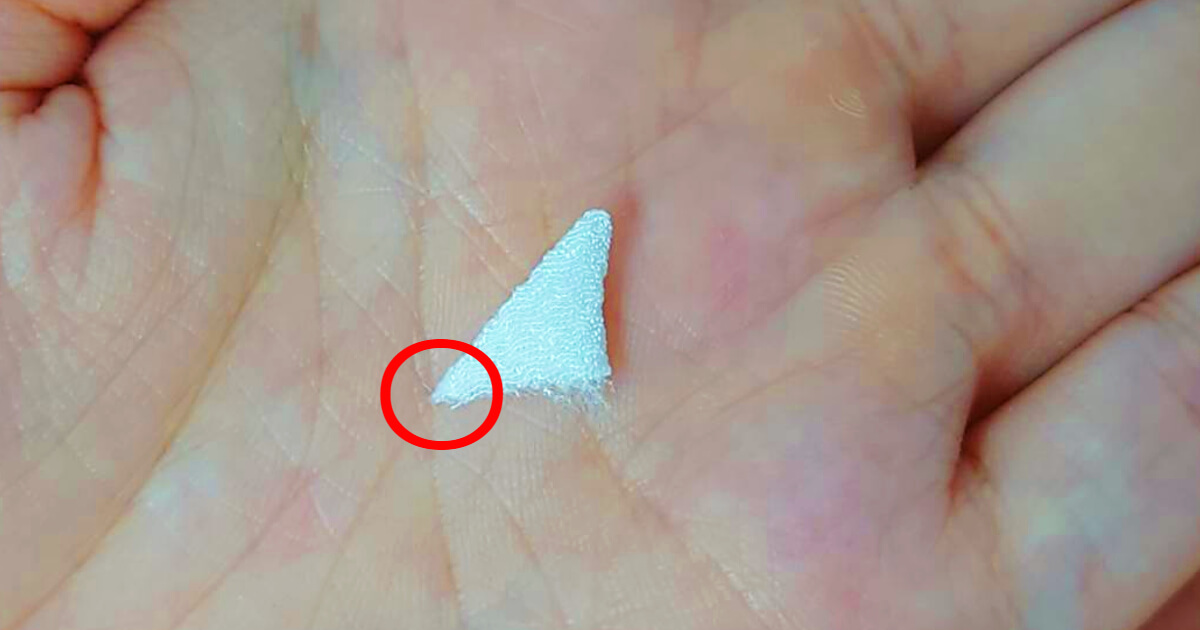 Cut the part where the 3 corners of Ken-Tsumami are aligned (acute angle part) so that the angle is about half. (See photo)
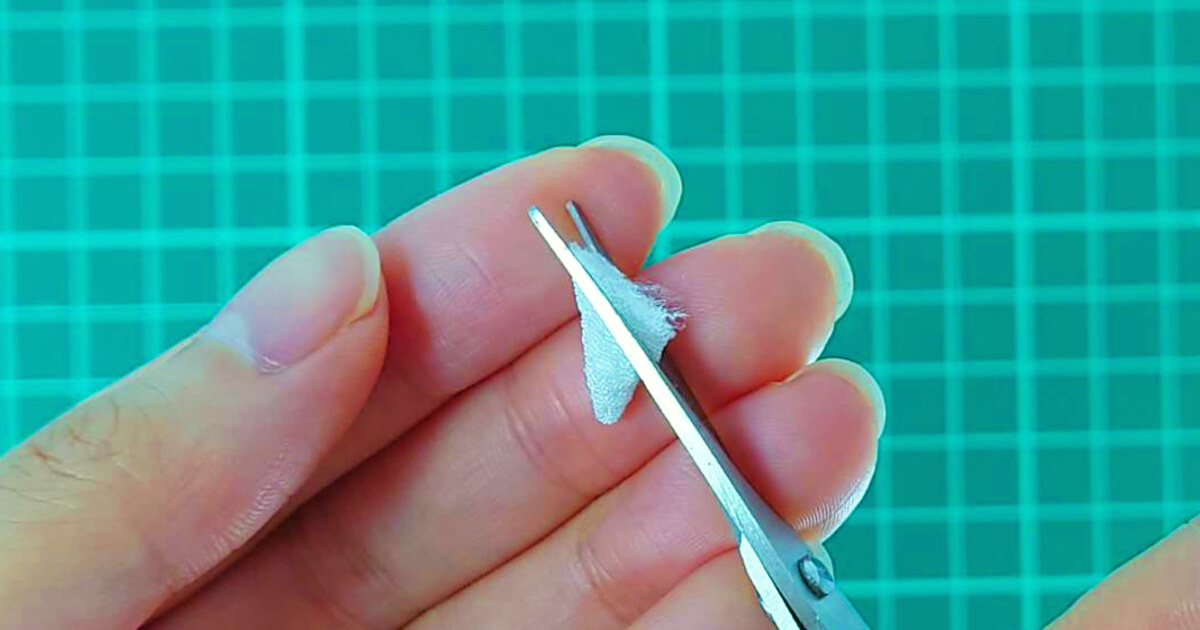
This is called “Hashi-Kiri”.
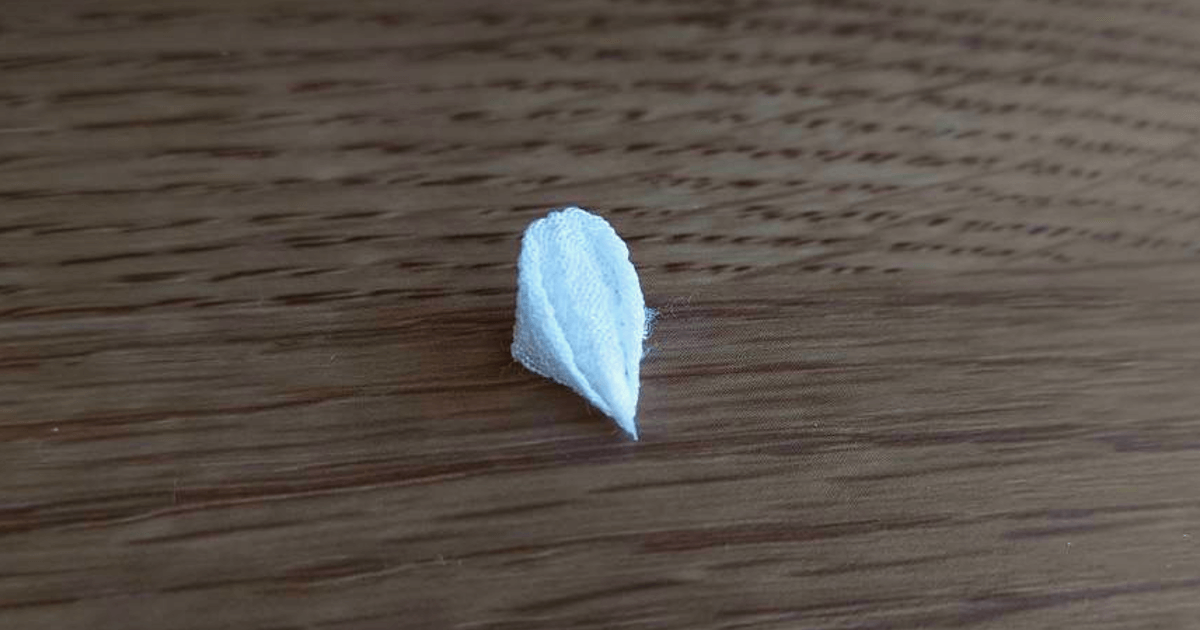
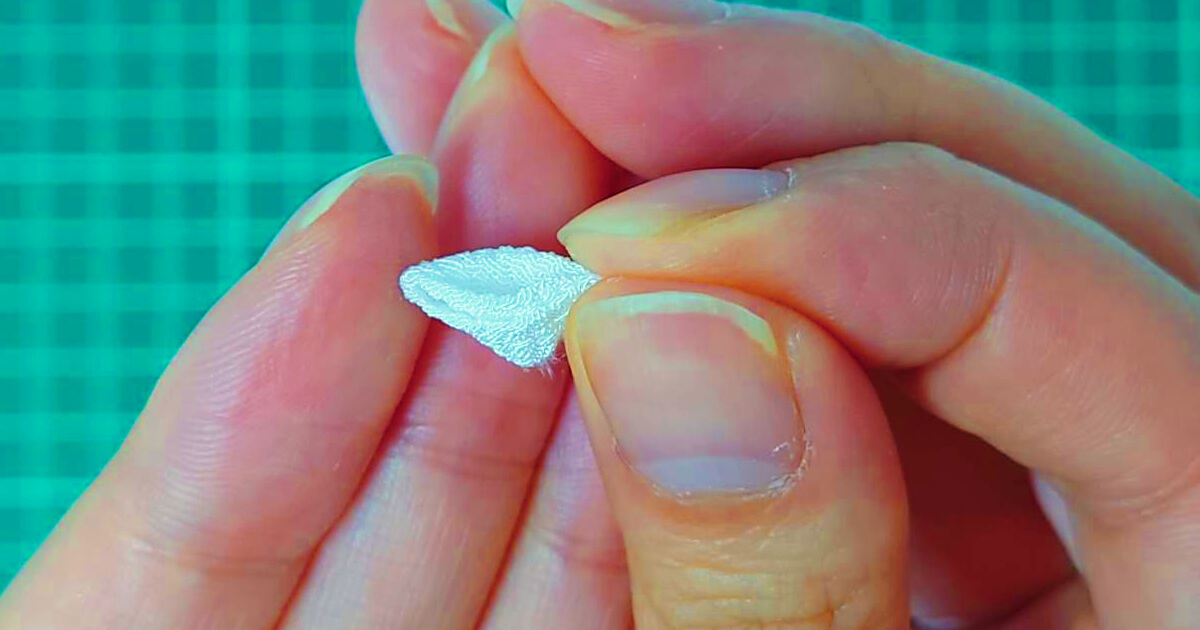
⑦ Done!
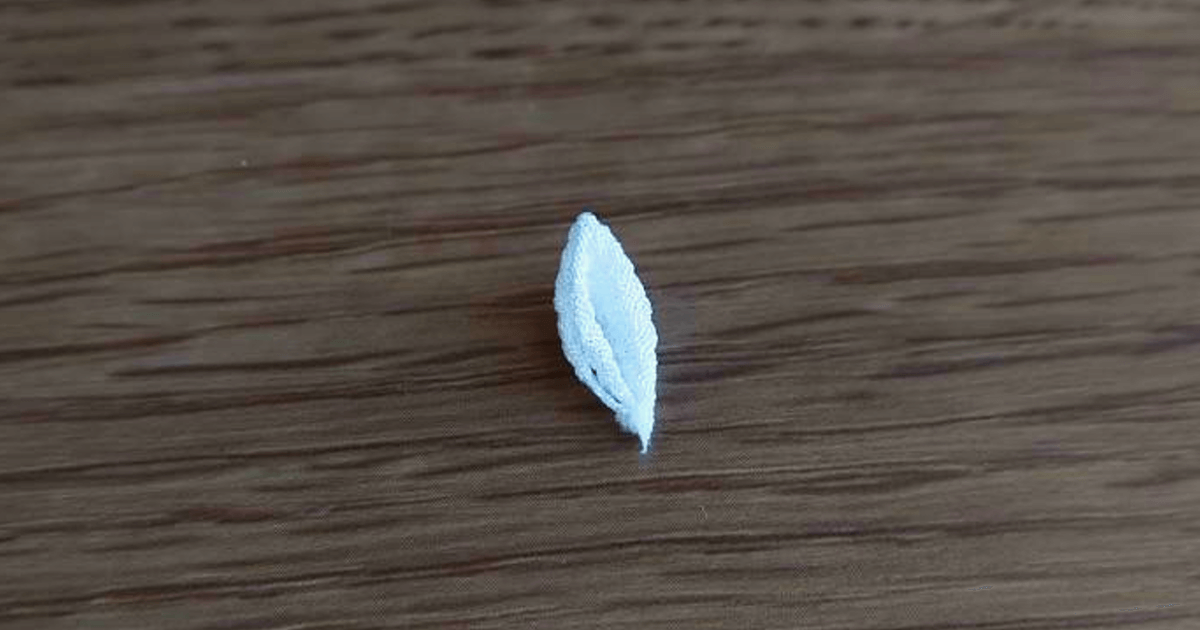 With this, Ken-Tsumami is complete ^ ^
Thank you for your hard work!
Isn’t it easier to use Ken-Tsumami?
For this one as well, you can make several Ken-Tsumami to make flower petals and attach them to the base to complete the Tsumami-Zaiku^ ^
*I will explain the foundation next time!
Summary
 How was it?
Both [Maru-Tsumami] and [Ken-Tsumami] were easier than I thought, right? ^ ^
If you can do this, you can do ‘Tsumami-Zaiku’!
Why don’t you try making Kanzashi, pierced earrings and art works with gorgeous and beautiful traditional Japanese art works?
*[Kanzashi] means “a traditional Japanese woman’s hair ornament”.


コメント